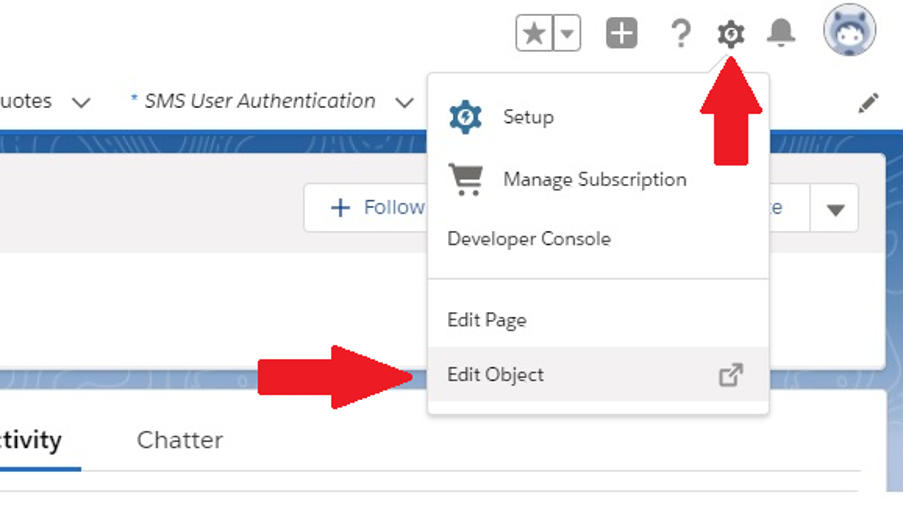
Salesforce Configuration
Only needed if integration items do not appear or need to be reconfigured.
Send SMS Button
Steps shown for Contact, will need to be replicated for Lead
- Within Contact record, select SETTINGS → EDIT OBJECT
- Click PAGE LAYOUTS and select CONTACT LAYOUT
Note: Some instances may have multiple Contact Layouts, you will most likely be using most recent date.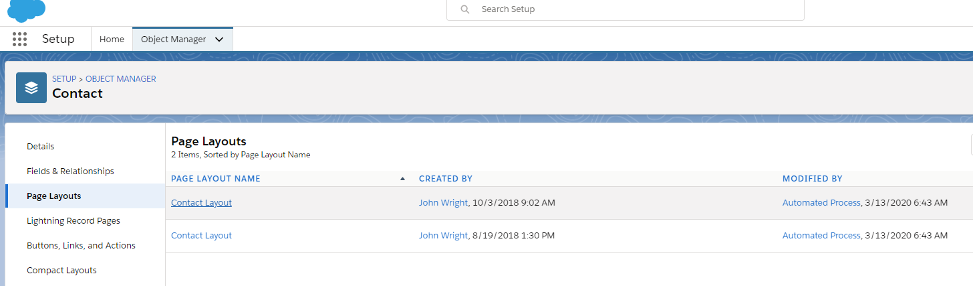
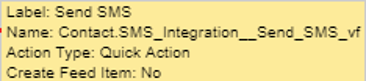
- Select MOBILE & LIGHTNING ACTIONS and scroll menu to Send SMS. (There will be multiple options, be sure to select (based on image below) and drag SALESFORCE MOBILE AND LIGHTNING EXPERIENCE ACTIONS section.
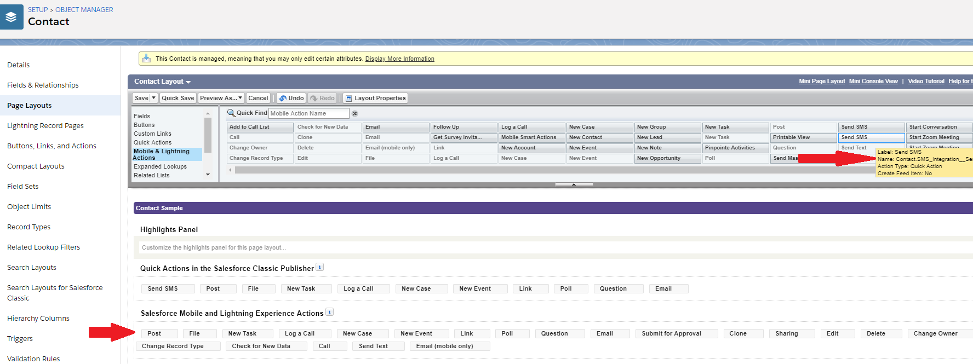
- Click SAVE
SMS Activity Reporting
- Within Contact Layout (location outlined in Send SMS), select RELATED LISTS
- Click SMS and drag ‘SMS’ button to desired location within Related Lists section of page.
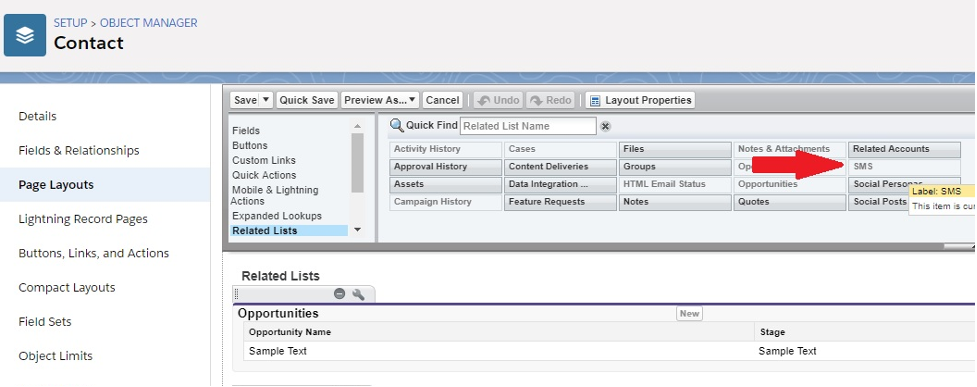
- You can configure SMS Activity view by selecting SMS gear icon once list appears in Related Lists section
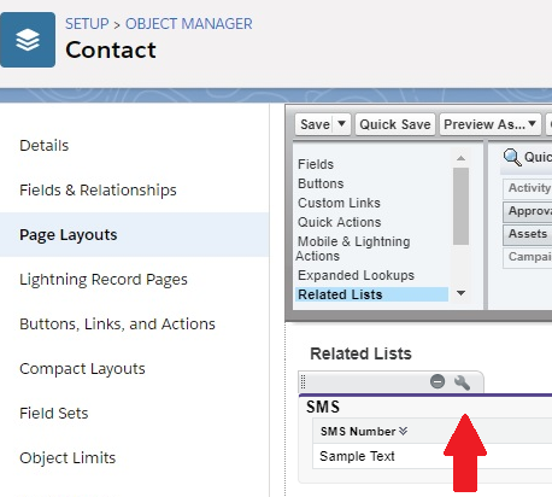
- Click SAVE
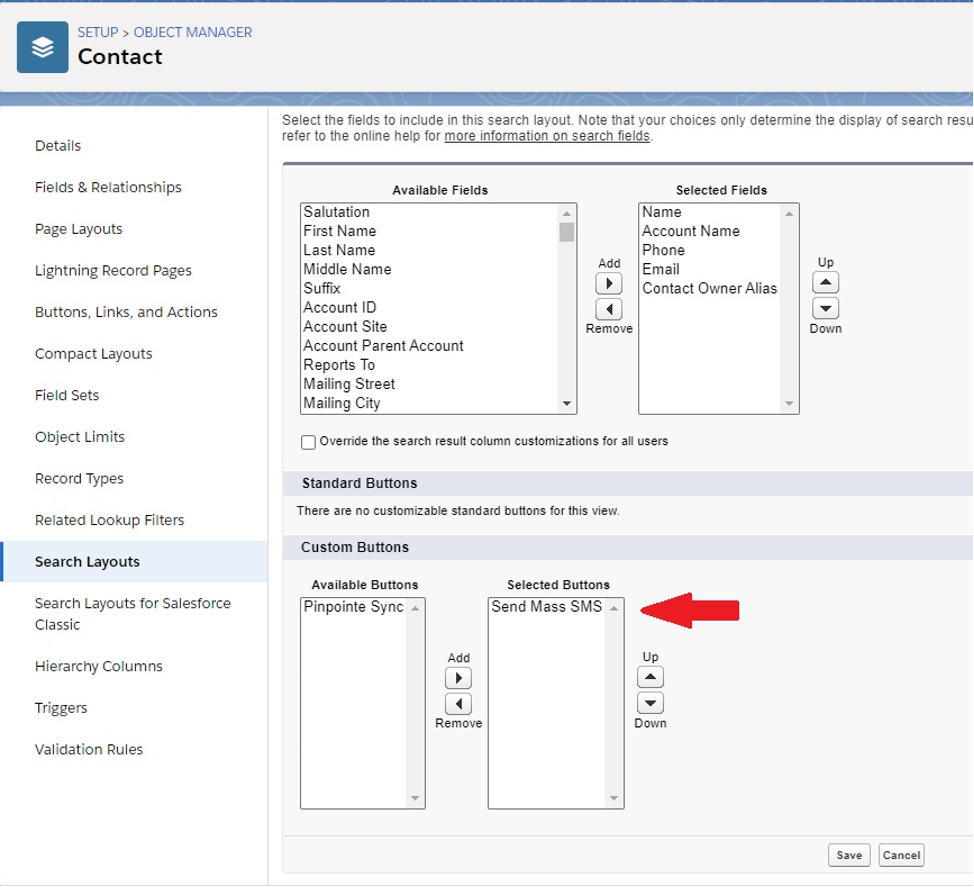
Send Mass SMS Setup
Steps shown for Contact, these will need to be replicated for Lead
- Click on CONTACTS tab and click on settings and select EDIT OBJECT
- Click on SEARCH LAYOUTS and select drop down to right of Default Layout (or preferred layout) and click EDIT

- Within Custom Buttons, place Send Mass SMS into Selected Buttons as shown below and click SAVE
SMS Template Setup
- Go to SETUP → Quick find box- type Template → choose CLASSIC EMAIL TEMPLATE → Be sure you are in SMS Folder
Note: All template names will identify record type (i.e. SMS Contact or SMS Lead) prior to template name.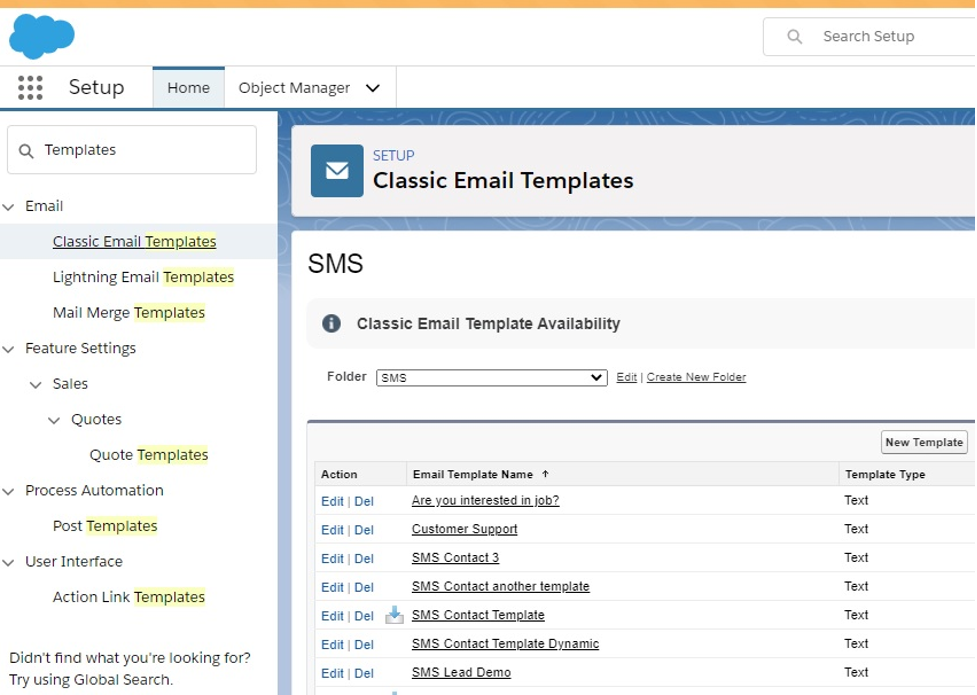
- You can choose to edit existing template or create new