Importing Contacts
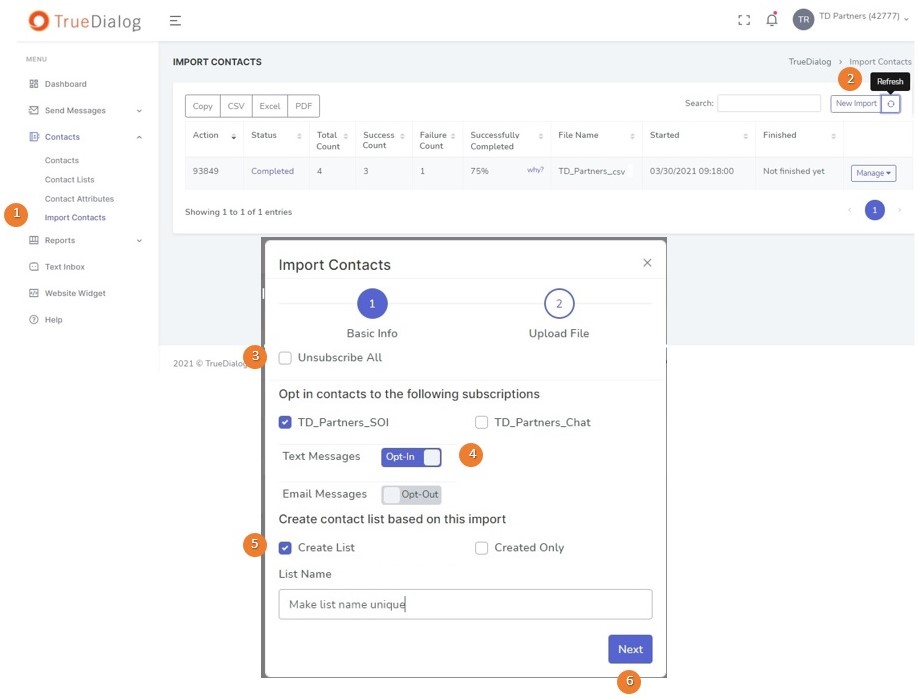
- Click Contacts>Import Contacts on left navigation menu.
- Click New Import
- Optional – Select Unsubscribe All for Mass Opt-out
- Choose Contact Subscription
- Dbl opt-in subscriptions will immediately send Handset Verification message upon import.
- Single opt-in subscription will create contact and opt them in without action by end user.
- Note – No selection will result in create/update of contact but no change to subscription status. Additionally, if a contact has been previously opted out, they will remain opted out.
- Check box to create contact list based on contacts within import file. When naming list, it is recommended that name be unique, such as including date. (Created Only will limit list to NEW contacts only)
- Click Next.
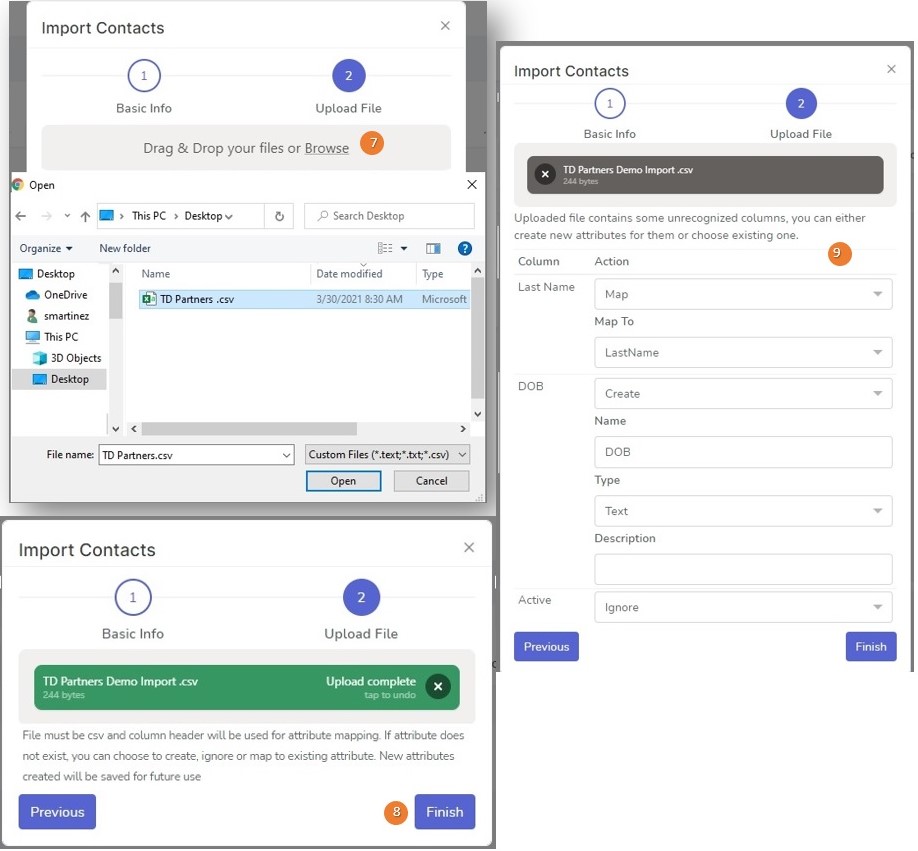
- Click Browse, select your CSV file and click Open to begin.
- If column headers in file match existing attribute(s) identically, Click Finish to complete. Note - If the subscription selected was a double opt-in (Type) a handset verification message will immediately be sent upon import.
- For column headers that do not match exactly
- You can map to existing.
- Create new attribute, data type required (text most common) and Description is optional.
- You can ignore column/data.
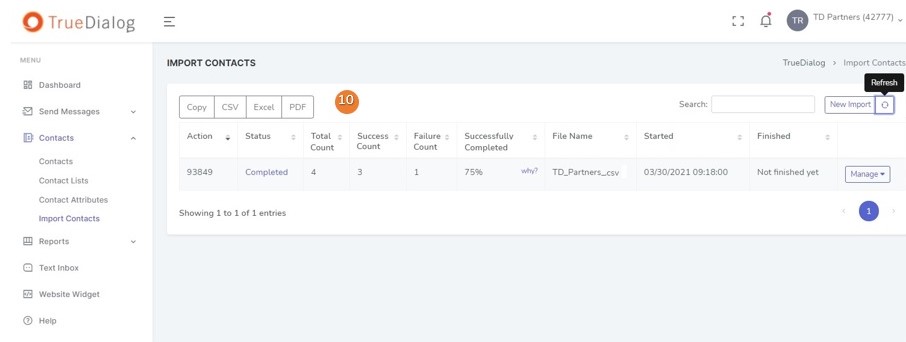
- Imports Dashboard Reporting
- Indicates status of import.
- Indicates total number of contacts within file and how many were successfully imported/updated.
- Indicates how many contacts failed, common reasons include invalid area code, invalid phone number or duplicates within same file.
- Clickable link which allows you the download report with failed contacts and reason for failure.